Normal operation
The projection screens, projectors, and computer-connected audio are configured via the wall panel interface. The wall panel interface is typically found at the corner of a classroom on the side of the projection screens. In some classrooms, the wall panel may be behind one of the projection screens if the projection screens are extended.
If you plan to project the screen of the workstation desktop computer, configure the projector(s) before signing in to your account. If you configure the projector(s) after signing in, then you need to manually configure cloning the monitor display to the projector manually. Note that you can manually configure Windows so that the monitor and the projector display different portions of an *extended desktop. However, in this configuration, you need to turn around to see what is projected on the projection screen.
If you plan to project the desktop of a laptop computer, follow the instructions that are specific to the operating system of the laptop computer. Only HDMI is supported. If your laptop computer has a Thunderbolt/USB 3 (or later), DisplayPort, VGA, or other connectors, you will need an adaptor so that the output is HDMI. The monitor on the workstation has a second HDMI port available. You have the following options to use your laptop computer:
- Mirror/duplicate/copy the laptop’s display to the projector. This only requires a single connection to the provided HDMI cable on the workstation.
- Extend the laptop’s display so that the extension connects to the projector. Unless you plan to turn around to see what is projected, you will need the following:
- If your laptop or USB docking station has two independent HDMI ports:
- Connect one HDMI output to the workstation monitor’s available HDMI port.
- Connect the other HDMI output to the HDMI cable on the workstation.
- Configure the two HDMI outputs to the same display area.
- This part is operating system dependent.
- If your laptop has one external monitor connector:
- Get a HDMI port duplicator that has one input and two outputs. These devices are also called HDMI splitters.
- Connect the HDMI output of the laptop computer to the input of the duplicator.
- Connect one output of the duplicator to the available HDMI port of the monitor.
- Connect the other output of the duplicator to the HDMI cable on the workstation.
- If your laptop or USB docking station has two independent HDMI ports:
Projection Screen operation
Click “Screen control” to get to the screen that operates the lowering and lifting of the projection screens.
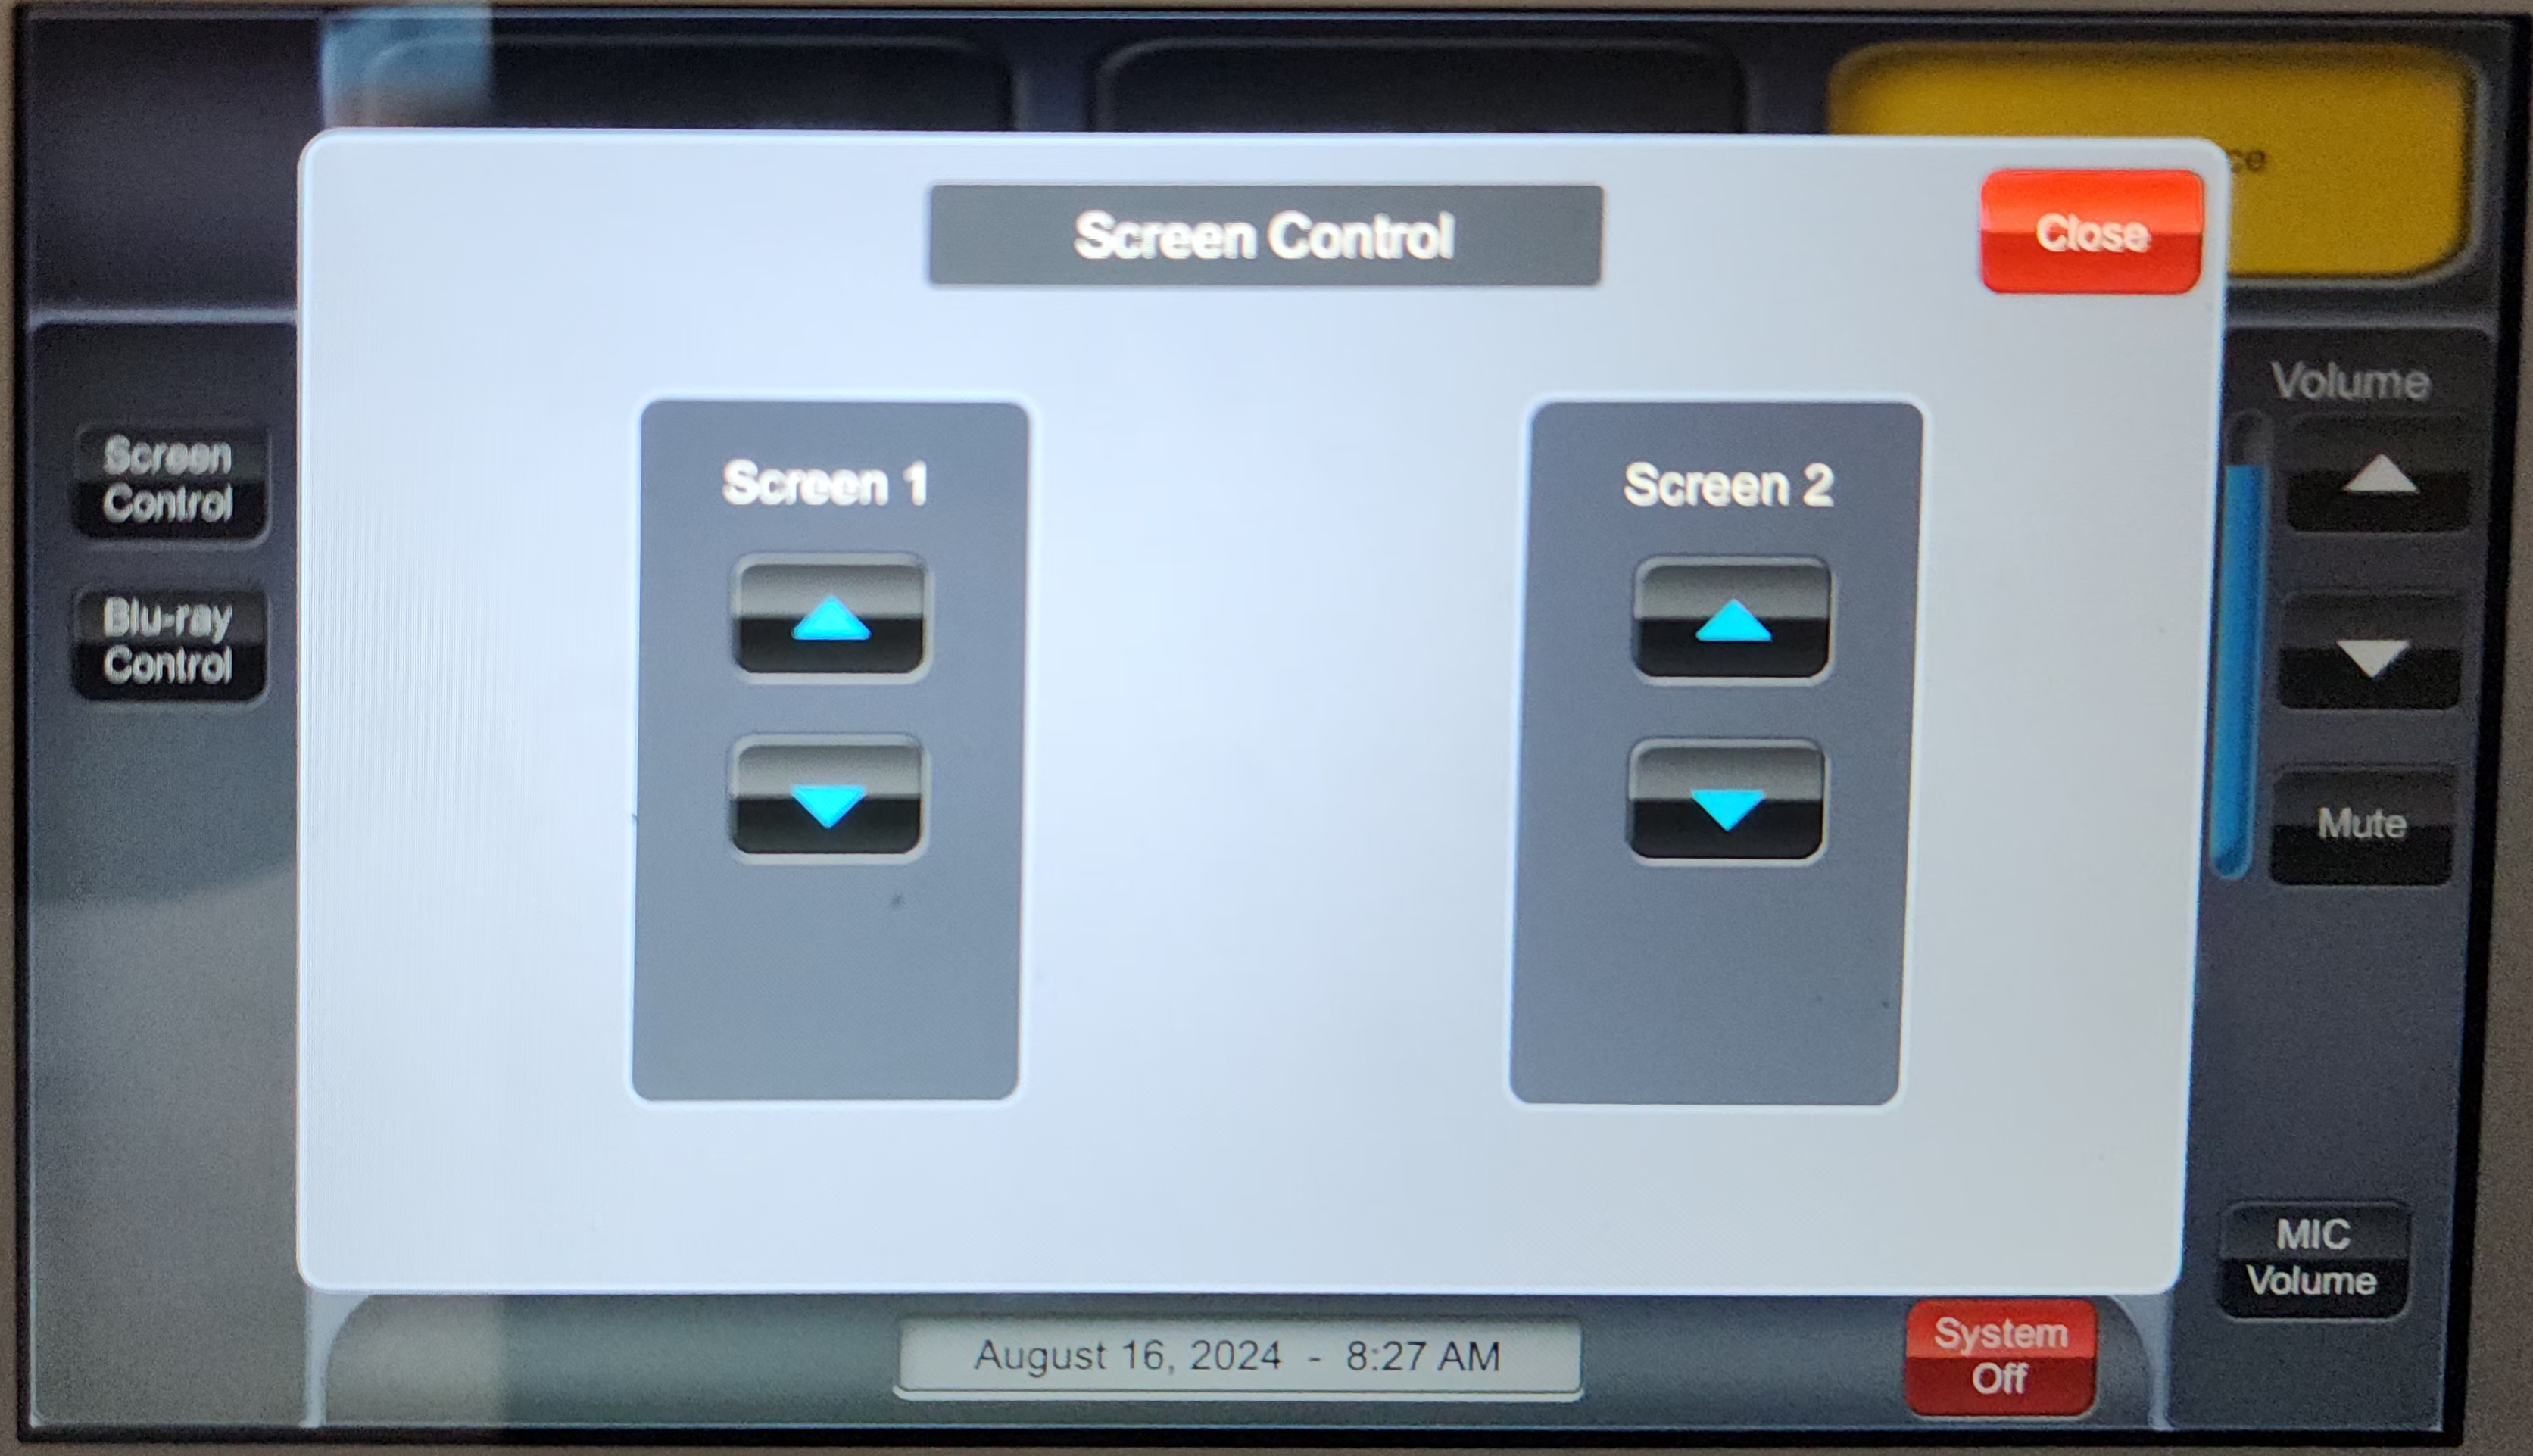
Most classrooms have two screens. The position of the screen matches the location of the buttons on the control screen. In some classrooms, a screen may lower to the position of the person operating the panel, or the person operating the panel may end up behind a lowered screen.
Video input
Most classrooms have two HDMI inputs and two projectors. The switching of video feed is specified by the “PROJECTOR1” and “PROJECT2” screens of the control panel. The positions of “PROJECTOR1” and “PROJECTOR2” correspond to the button location.
The control panel of each projector has several connection options.
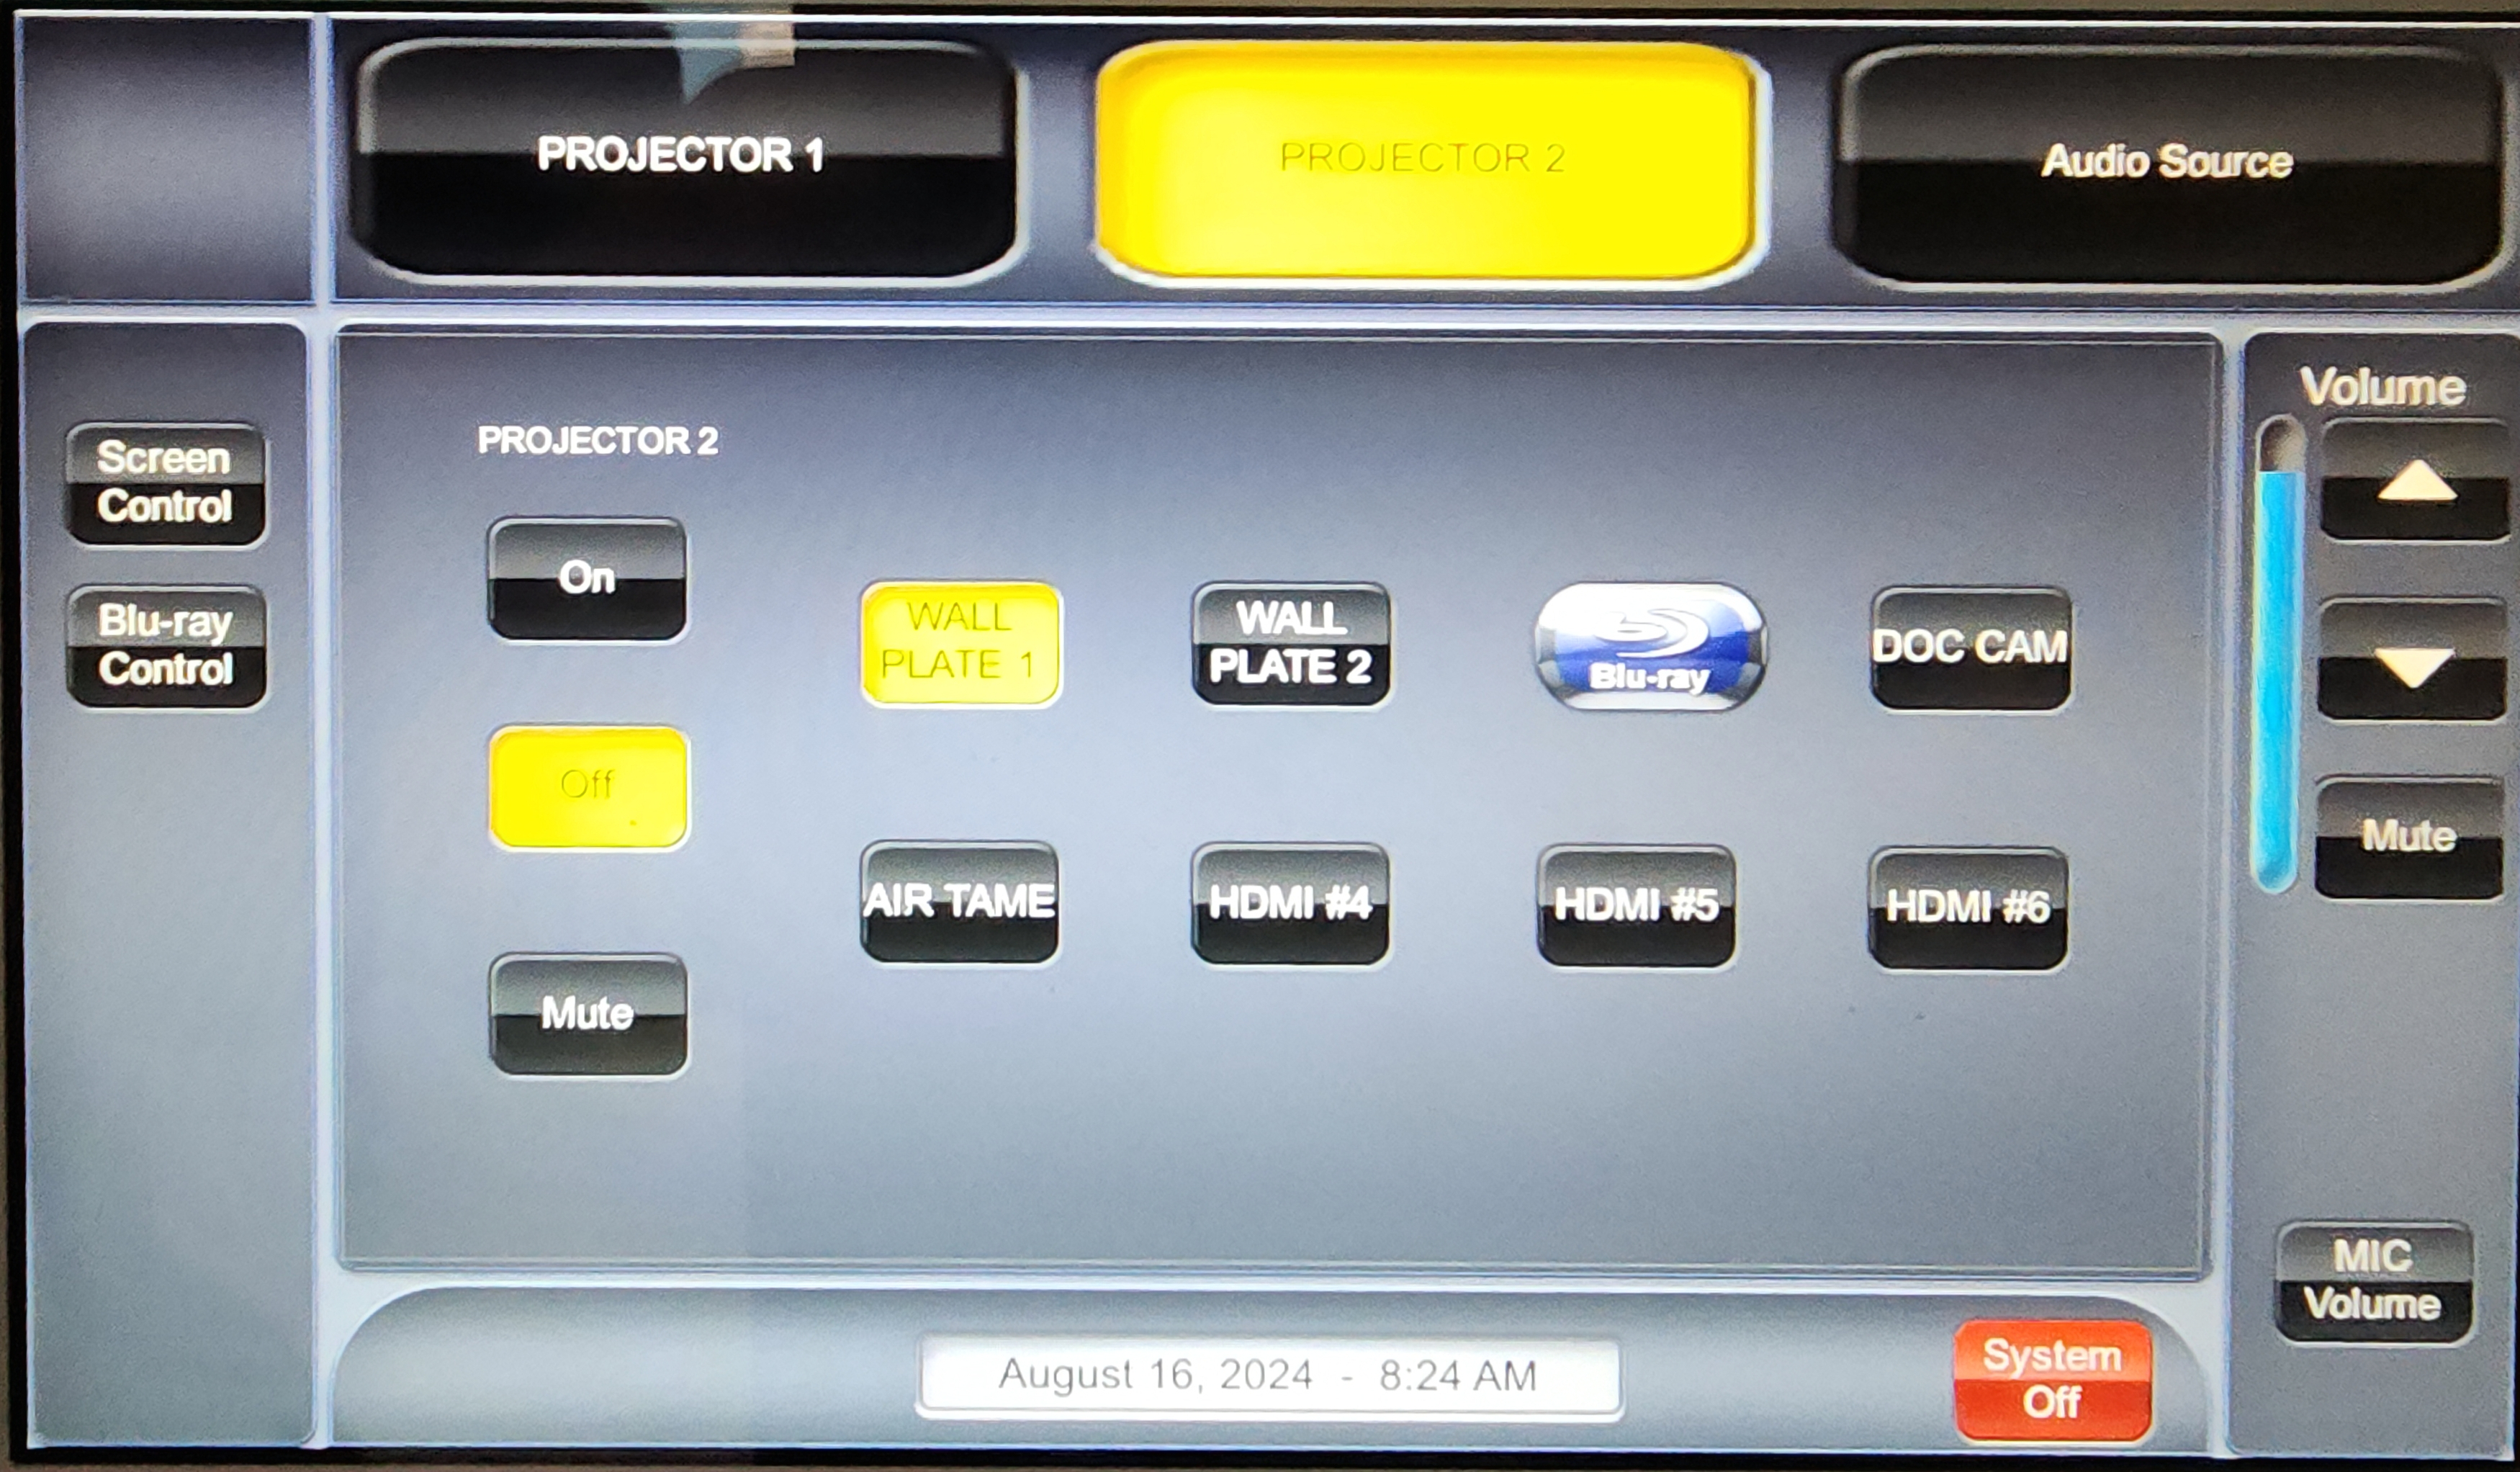
- Off
- WALL PLATE 1: Connected to wall plate 1 (workstation desktop computer)
- WALL PLATE 2: Connected to wall plate 2 (HDMI cable on the workstation)
- DVD Blu-ray: connected to the DVD player in the cabinet
- DOC CAM: connected to the dedicated document camera
Note that the projectors do not automatically turn off. At the end of a class, please remember to power off the projectors. Click “System Off” to turn of the projector(s) at the end of a class.
Audio
Most classrooms have amplifiers suitable for presentations. The amplifier can be connected to the audio of a HDMI connection.
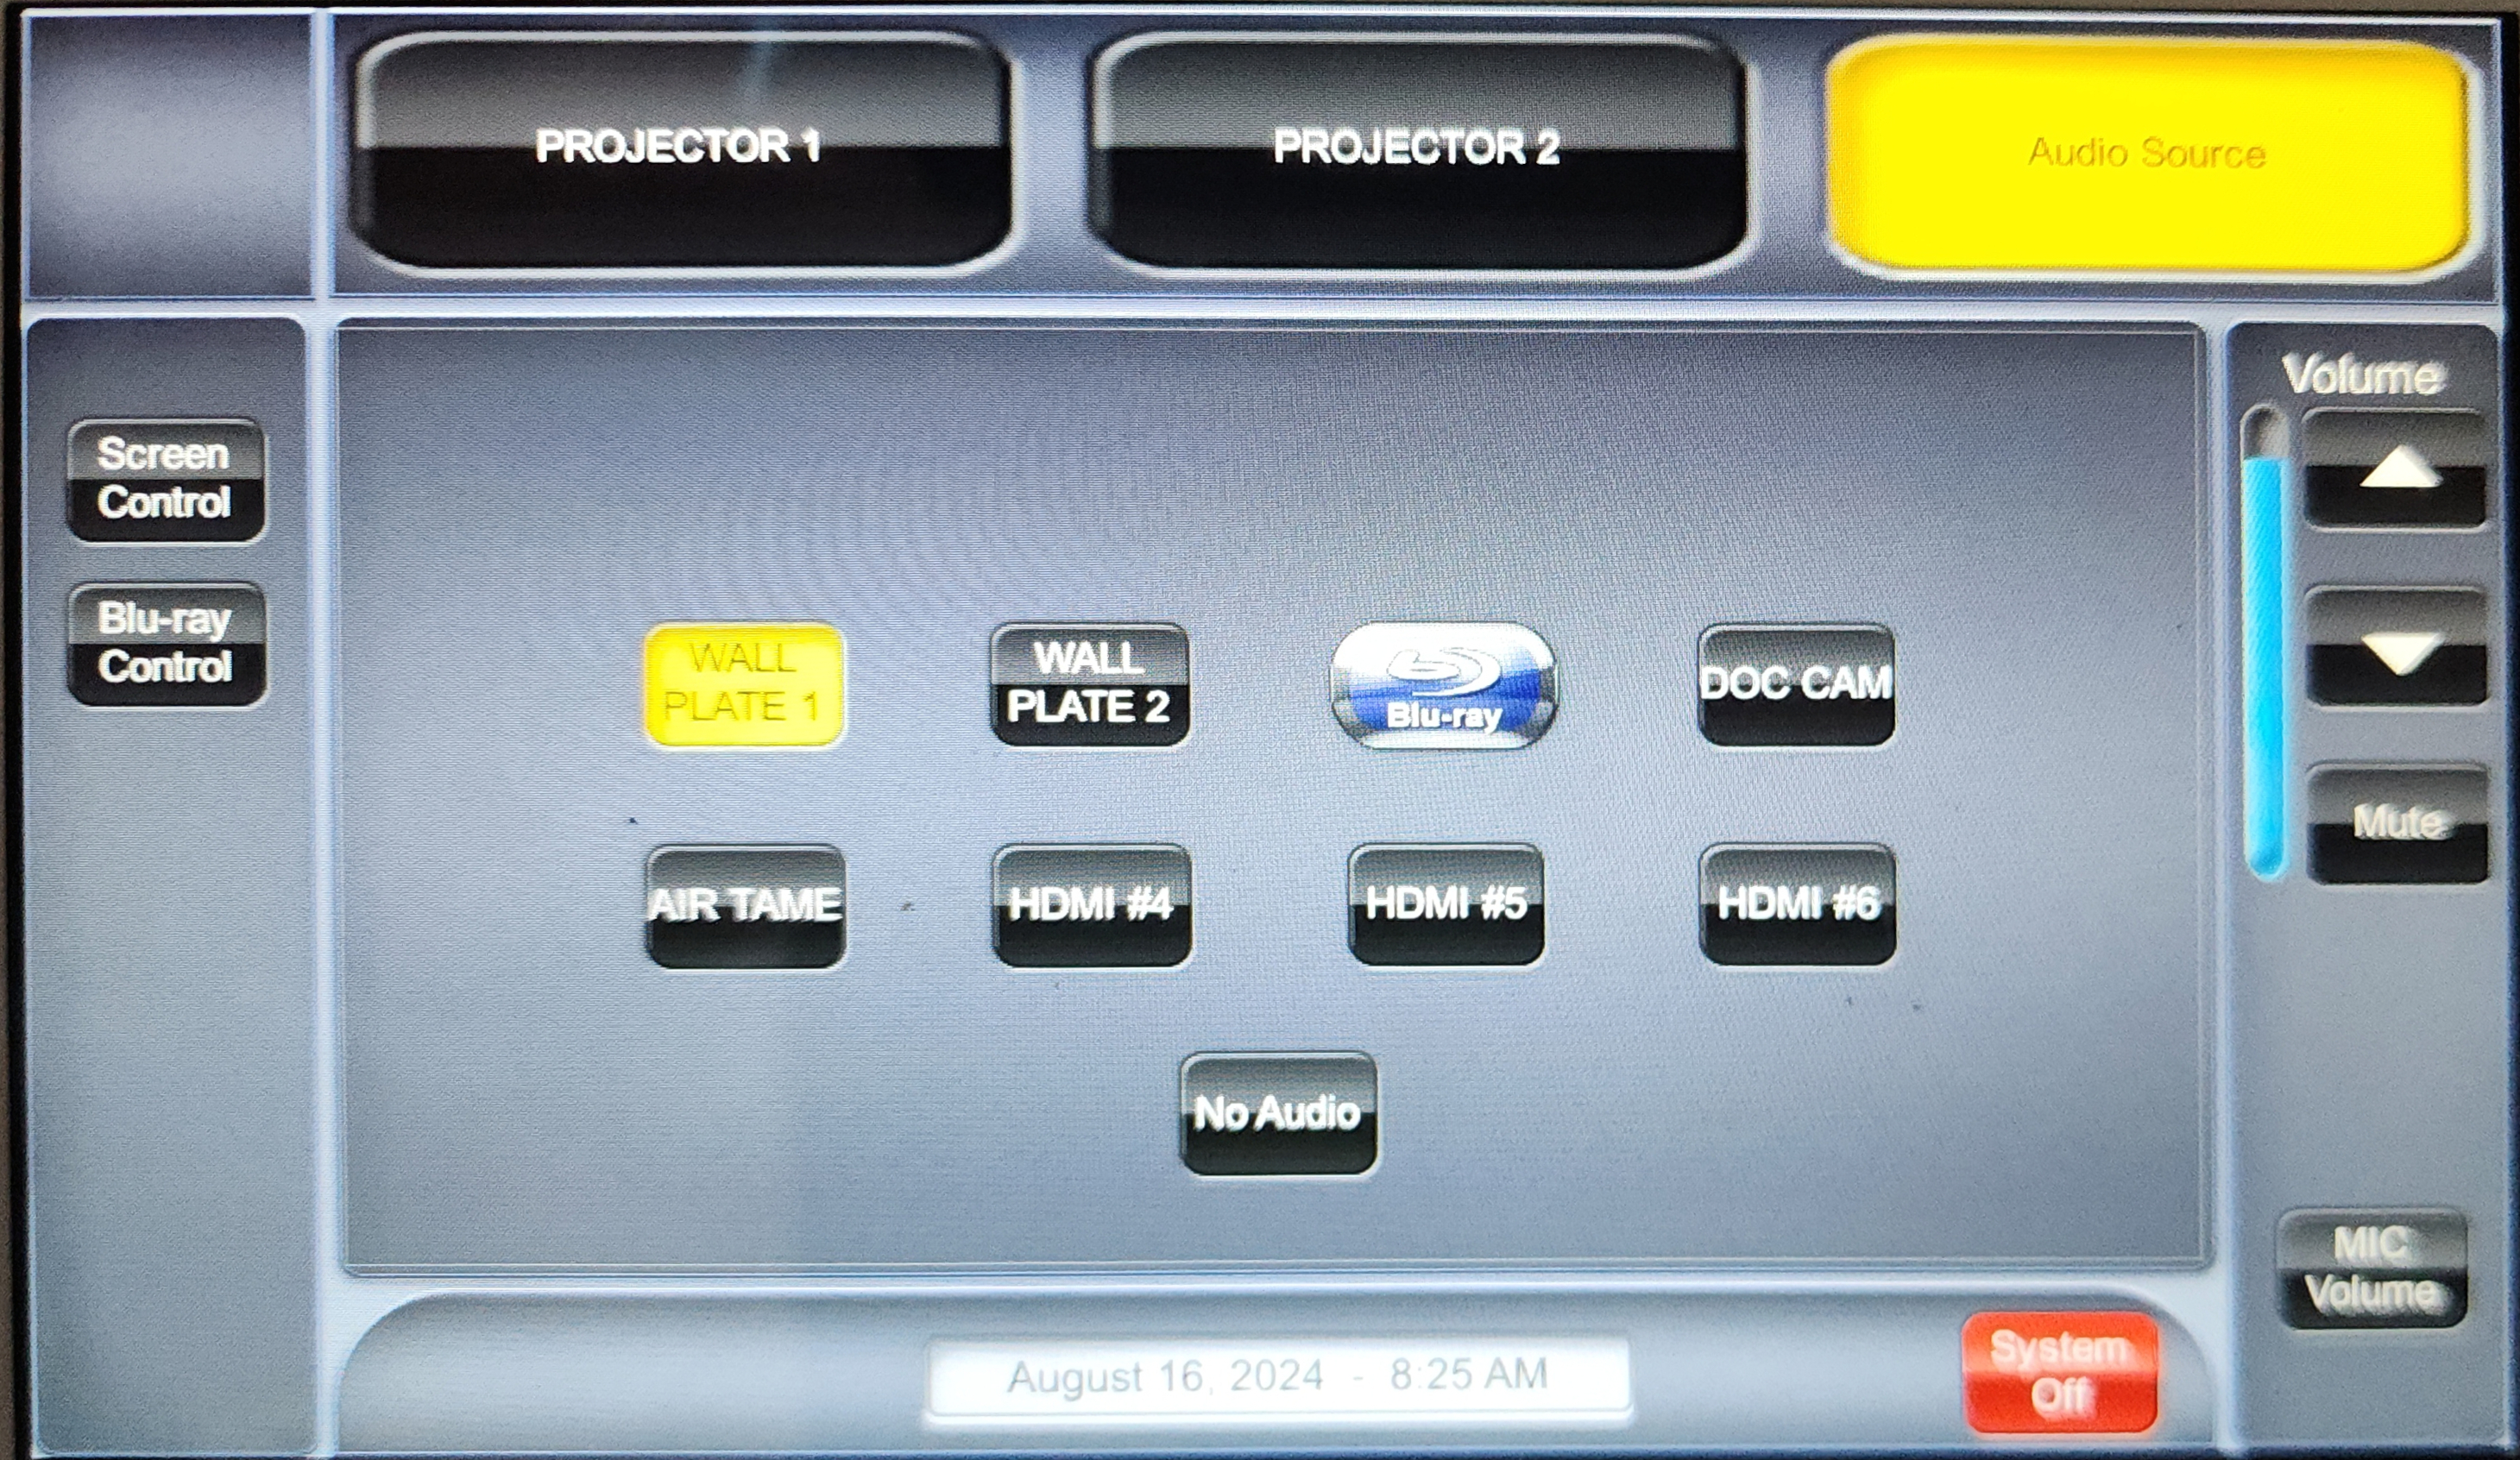
The buttons in the audio source screen is similar to the projector screens. Because HDMI includes audio, “WALL PLATE1” and “WALL PLATE2” correspond to the HDMI wall plates as explained in the Video Input section.
Trouble shooting
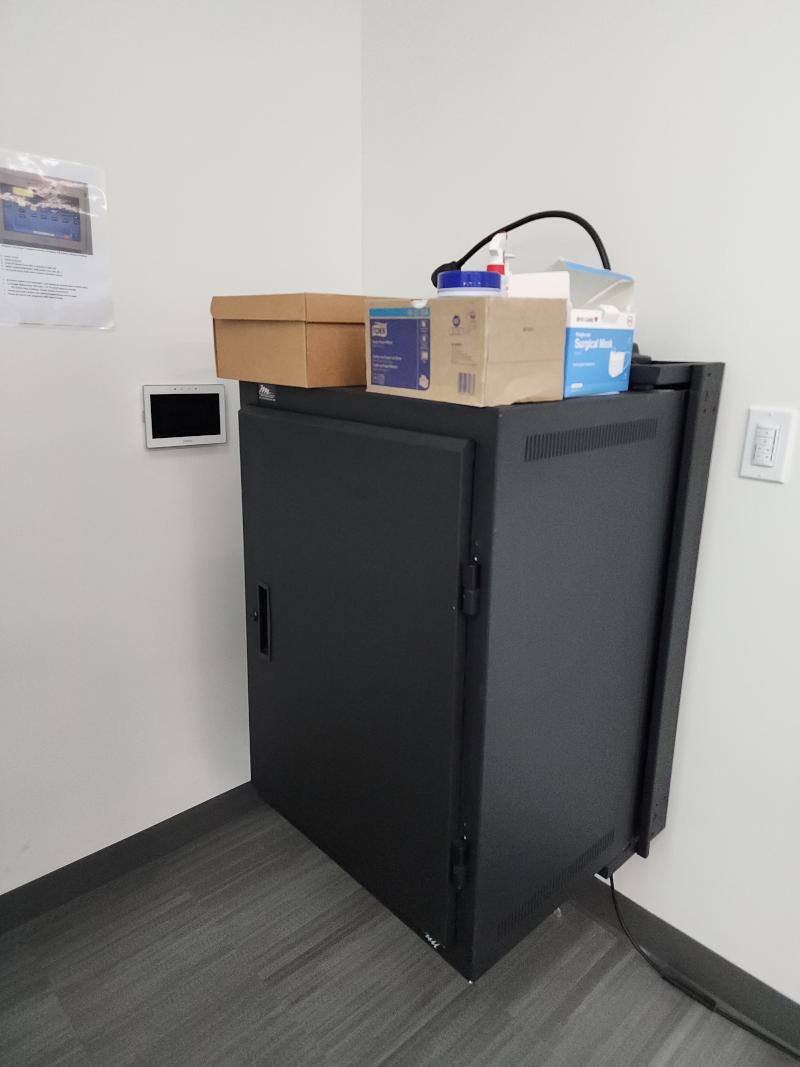
- Hard reset: there is no easy way to reboot the control panel and the A/V switch. It is safe to open the cabinet housing the A/V equipment, and cycle power using the power strip. There are occasions when the A/V switch stops working and requires power cycling.
- If the video connection is changed after booting into Windows, Windows may not recognize the change and reconnect to one or two of the projectors. After reconfiguring the video connection, it is best to log out and log back into Windows.
- The HDMI cable to wall plate connection can be physically loose. If the video is flaky or not working, check the physical connection of the cable-wallplate connections.